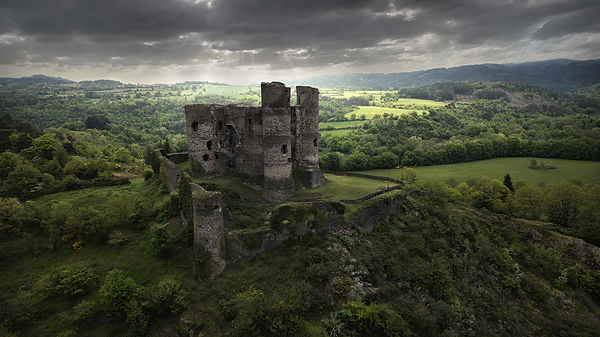
Cinematic editing in Photoshop is not just a technical matter, but a matter of vision. In this course you will learn how to transform your images into atmospheric and cinematic scenes through a complete workflow that includes light shaping and advanced color grading. Beyond the technical aspects, this training focuses on developing a strong artistic concept, allowing you to guide every phase of the editing process in an intentional and coherent way.
What you will learn:
Concept & Vision Breakdown – A 45-Minute Deep Dive
Before the process, there is vision.
In this session I go into the core of my approach: not how to interpret an image, but how to develop a personal concept and turn it into something concrete.
It’s not about applying rules or replicating a style.
It’s about building a direction.
You will learn how to start from an idea, even a vague one, and shape it into a clear guide for the entire editing process.
Because without a concept, every adjustment remains isolated.
With a concept, every choice becomes part of a coherent whole.
This is where an image truly begins.
✅ How to transform inspiration into a concrete editing process
✅ Light Creation to introduce creative light into the scene
✅ Advanced dodge & burn techniques to shape light and shadows
✅ Color grading and toning to create atmosphere and depth
✅ Use of luminosity masks for selective image control
✅ Enhancing light for a more dramatic impact
✅ Use of plugins such as Boris FX and Topaz Pure Raw to refine details
Note: Although Boris FX and Topaz Pure Raw are used in the tutorial, these tools are not essential to the workflow.
THE LATEST VERSION OF PHOTOSHOP IS NOT REQUIRED. THE OLDEST COMPATIBLE VERSION IS PHOTOSHOP CC 2013. AN INTERMEDIATE KNOWLEDGE OF PHOTOSHOP IS REQUIRED. THIS IS NOT A BEGINNER COURSE.
Suddivisione del Workflow:
1. Finding Inspiration and Conceptualizing the Edit
-
How to transform an artistic vision into a retouching plan
-
Understanding light, atmosphere and storytelling within an image
2. RAW File Preparation & Initial Enhancements
-
Using Pure Raw for noise reduction and initial sharpening
3. Light Creation and Scene Optimization
-
Preparing the RAW file for synthetic light creation
-
Using specific tools such as Boris FX Optics to create synthetic light and glow
4. Dodge & Burn for Depth and Dimension
-
Manual dodge & burn with soft brushes
-
Using luminosity masks (TK9)
-
Improving subject separation and shaping the light
5. Luminosity Masks for Targeted Adjustments
-
Creating and refining luminosity mask
-
Enhancing texture and depth with precision
6. Color Grading & Toning for a Cinematic Look
-
Simulating cinematic color palettes for a fantasy aesthetic
7. Adjusting haze and glow for an immersive atmosphere
-
Painting light manually for a natural and painterly effect
8. Final Touches & Export
-
sharpening
-
Export settings to preserve image quality
At the end of this tutorial, you will have a complete understanding of how to radically transform light within your images, giving them a dramatic and painterly atmosphere.
The software used in the videos includes Adobe Photoshop CC2026, Adobe Bridge, Adobe Camera Raw, DxO Nik Collection, Boris FX, and the Tony Kuyper TK9 Panel.
FOR VIDEO PLAYBACK, THE USE OF VLC PLAYER IS RECOMMENDED. You can download it HERE
Once the video has been purchased, please note that as it is a digital product, no form of refund is possible.
In case of playback issues or failure in service delivery, you can contact me at info@enricofossati.it
The Workflow is totally manual without the use of script or Automations
Beyond the Landscape
When Vision Becomes Atmosphere


Before
After